Using the pop up block module
To create a pop up block on DHI:
Add basic block. Create a basic block on the site.
Place the block in the breadcrumbs region
Configure the pop up block
Enable the pop up block
Configuring the pop up block
Pop up blocks are configured in Configuration -> Media -> Add simple popup blocks
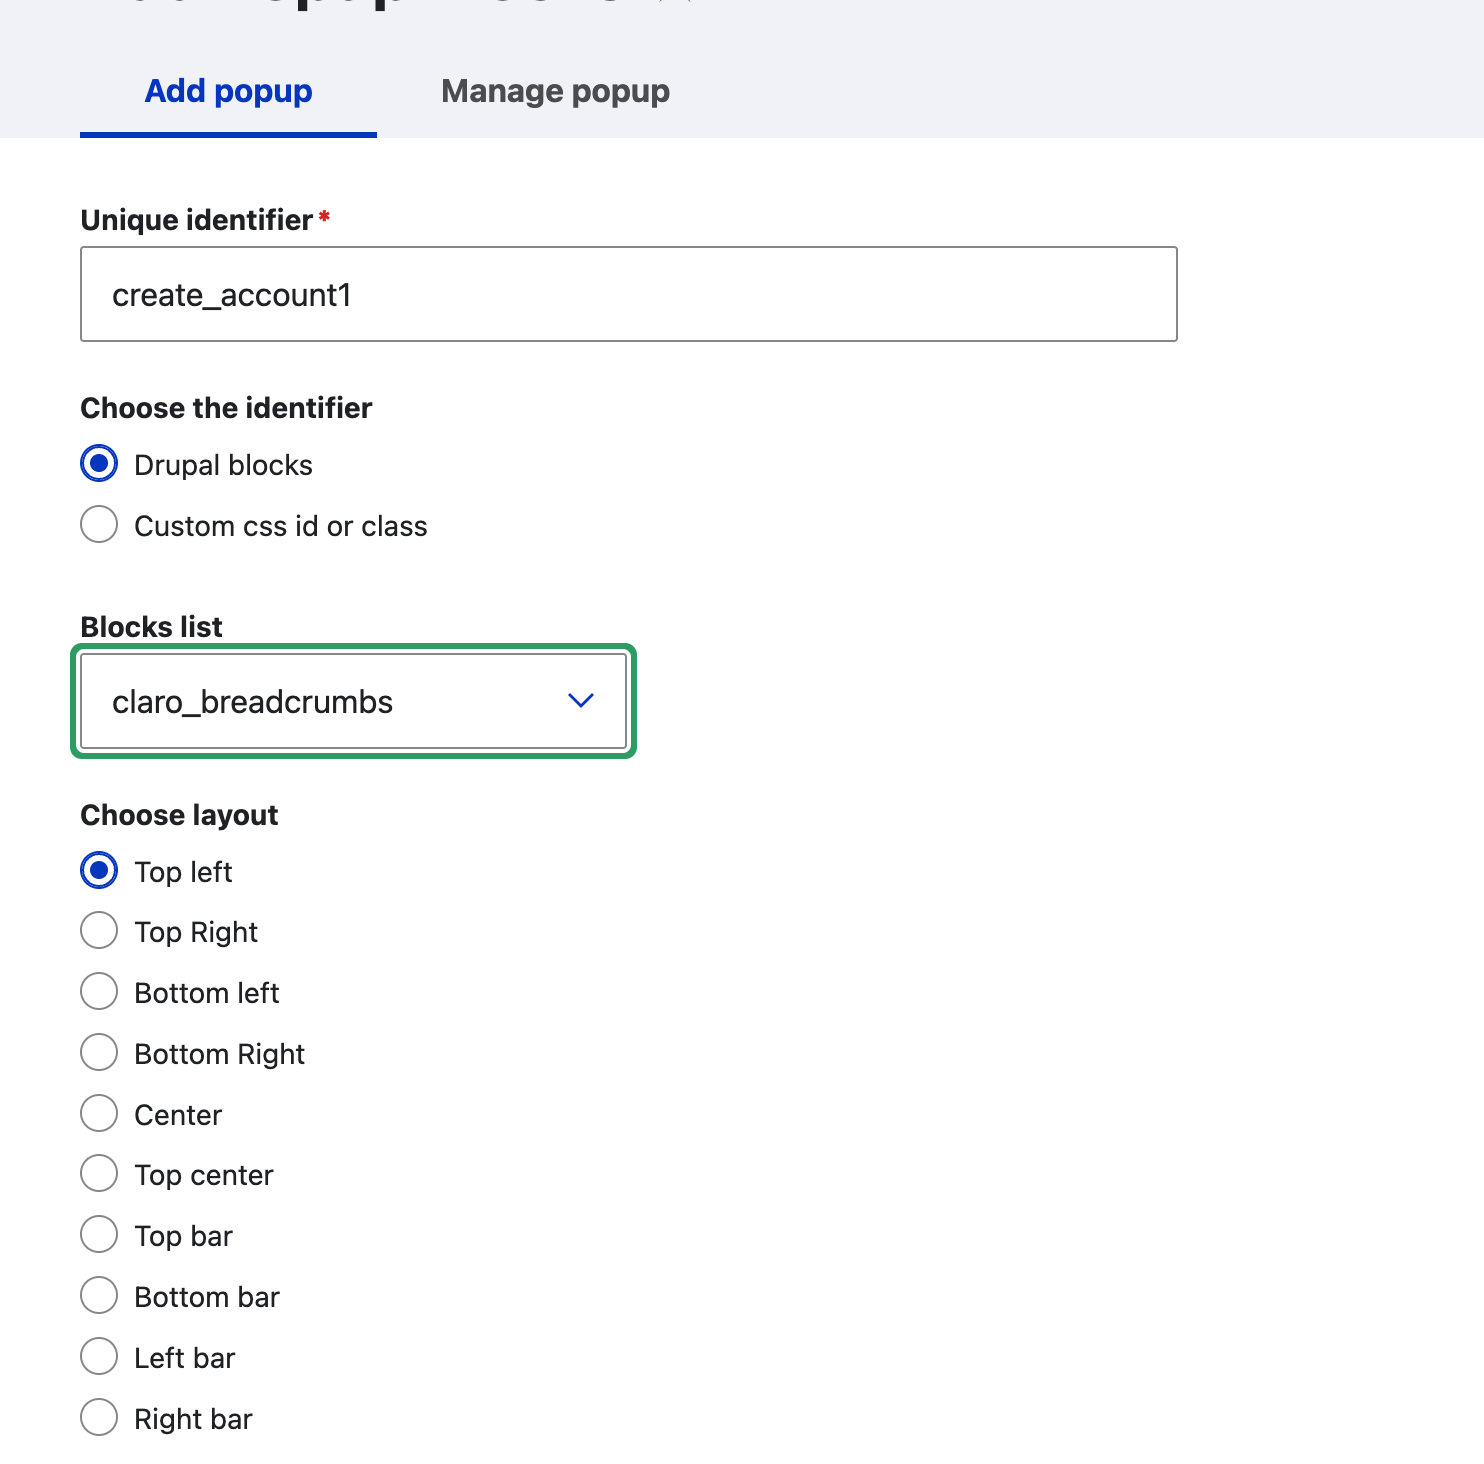
Create a descriptive unique ID for the popup block
Pick the block to use for the pop up (note: blocks are prefixed with the name of the theme they are associated with)
Determine where you want to place it. Most should be placed in the Center
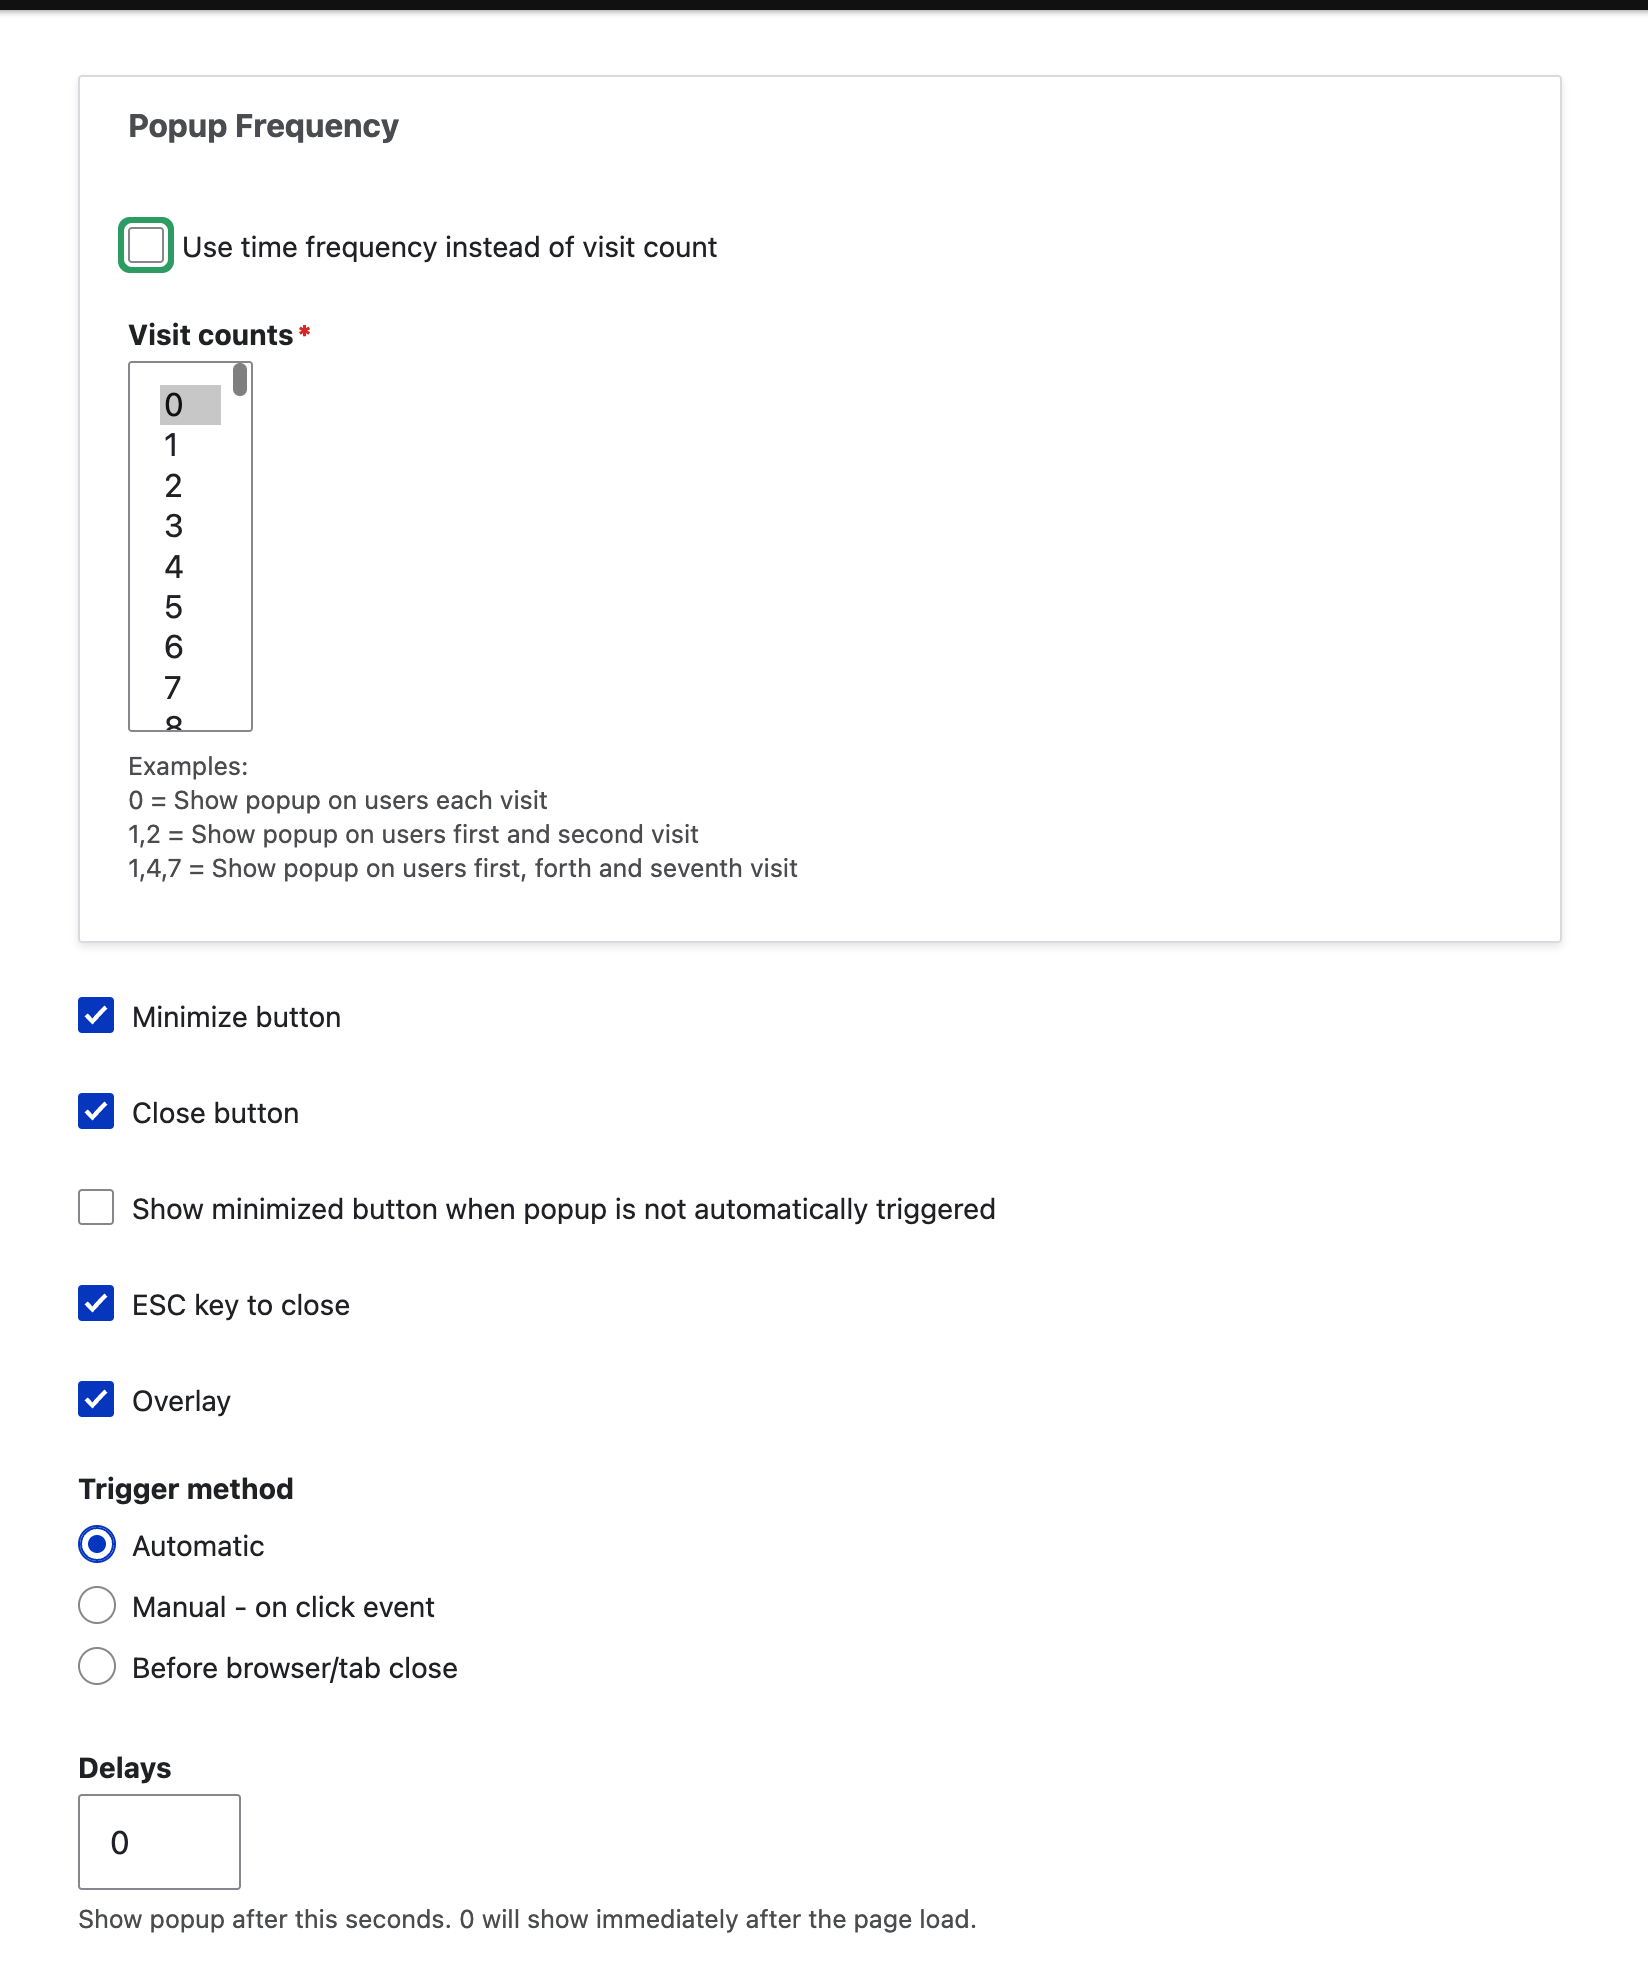
Determine the pop up frequency. There are 2 options:
Based on visit. For example, set the account creation block to 0 to have it appear on every visit but maybe we only want to fire a survey block every 5th visit, so set it to 5
Based on time. This allows one to set it hourly, daily, or weekly. For example, we may want a survey block to only fire once a day regardless of the number of visits.
Set the trigger and other settings
Close button should always be checked
ESC key to close should always be checked
Overlay should usually be checked
Set the trigger method to automatic
Set the delay to:
0 if you want the block to load when the page loads
A positive number if you want the block to load on a time delay.
Warning
Once saved, you must check the “Enable this as a popup” for the change to take effect and you must clear caches (or ask Gwen or Mike to do that).
Note
Once created, there is a set of classes defined in the adjustment class. Create a developer ticket to theme the block and hide the CSS if necessary.